前言
Vercel 是一个非常不错的无服务器公司。我们可以利用它搭建一个简单的图床。
| 项目 | 数据库大小 | 读 | 写 | 请求数 | 请求时长 | 是否需要 Projects |
|---|---|---|---|---|---|---|
| Hobby | 250MB/月 | 1亿/月 | 1亿/月 | 1亿/月 | 1小时/月 |  |
做法
-
准备一个 Vercel 账号,可以直接使用 Github 登录
-
创建存储库(点击快速创建):Create
-
在接下来的页面中,名称自己填写,然后添加一个 Blob Store,确定即可
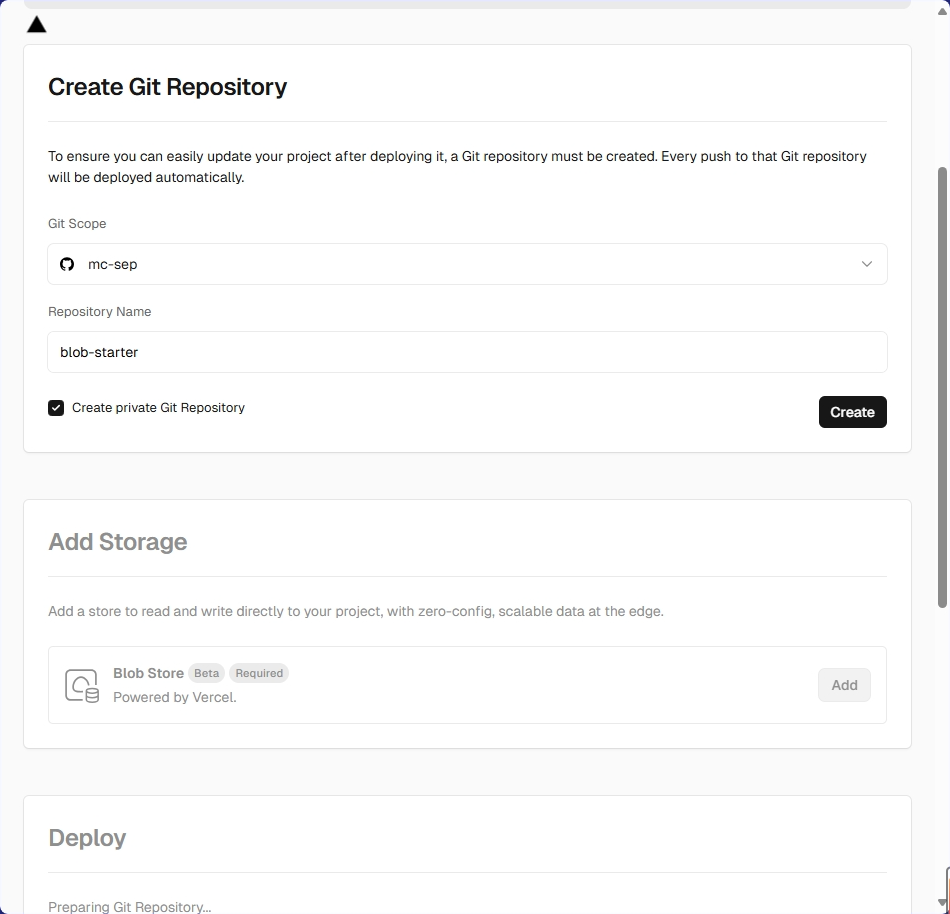
注意:每个用户只允许创建一个 Vercel Blob Storage!
-
直到出现庆祝动画,点击 Continue to Dashboard。
-
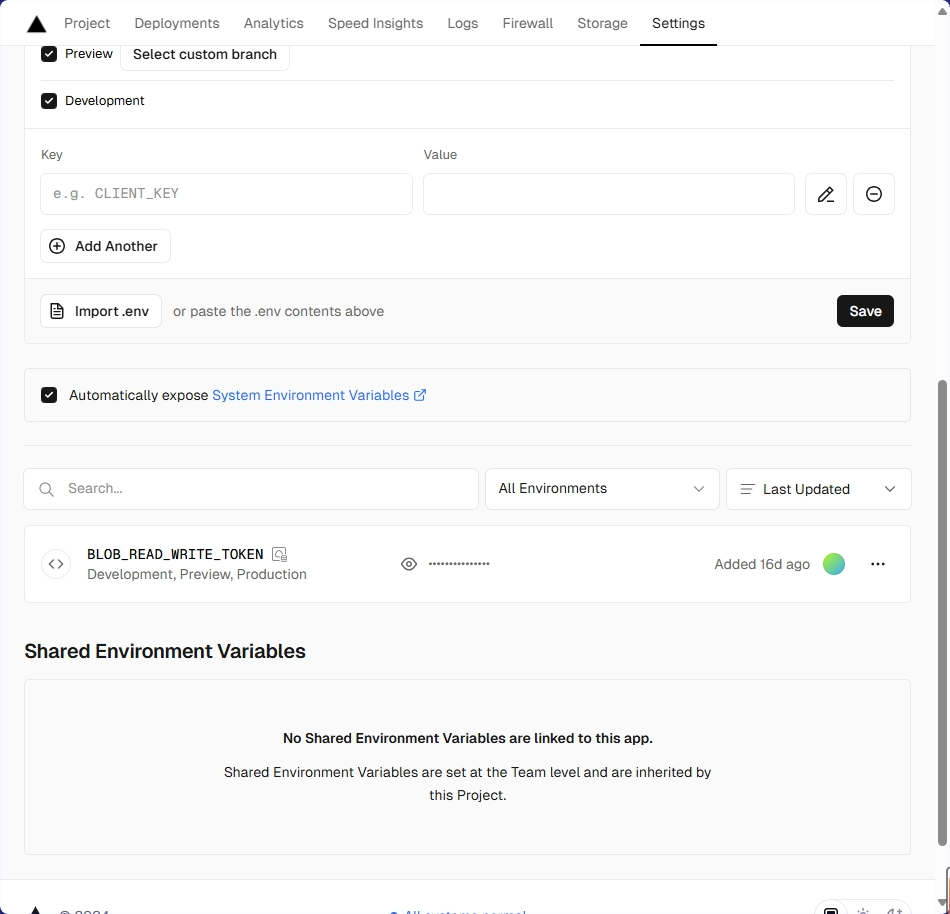
点击 Settings → Environment Variables,在最下方找到名为 BLOB_READ_WRITE_TOKEN 的环境变量,点击复制,格式如下:
vercel_blob_rw_*************************************
-
返回 Settings → Functions,将区域更改为 Hong Kong (East) – hkg1 或 Tokyo, Japan (Northeast) – hnd1
-
返回 Dashboard 主页面,点击按钮进入创建的 Github Repo:
- 打开文件 .env.example,将复制的内容粘贴到末尾,格式如下:
BLOB_READ_WRITE_TOKEN=vercel_blob_rw_*******************************
- 打开 [Main Blob Storage] / app / page.tsx,修改里面的内容为中文(建议保留原站链接),可参考我的配置
import Image from 'next/image'
import Link from 'next/link'
import ExpandingArrow from '@/components/expanding-arrow'
import Uploader from '@/components/uploader'
import { Toaster } from '@/components/toaster'

export default function Home() {
  return (
    <main className="relative flex min-h-screen flex-col items-center justify-center">
      <Toaster />
      <Link
        href="https://vercel.com/templates/next.js/blob-starter"
        className="group mt-20 sm:mt-0 rounded-full flex space-x-1 bg-white/30 shadow-sm ring-1 ring-gray-900/5 text-gray-600 text-sm font-medium px-10 py-2 hover:shadow-lg active:shadow-sm transition-all"
      >
        <p>可自改内容这是一个横幅</p>
        <ExpandingArrow />
      </Link>
      <h1 className="pt-4 pb-8 bg-gradient-to-br from-black via-[#171717] to-[#575757] bg-clip-text text-center text-4xl font-medium tracking-tight text-transparent md:text-7xl">
        可自改这是大标题
      </h1>
      <div className="bg-white/30 p-12 shadow-xl ring-1 ring-gray-900/5 rounded-lg backdrop-blur-lg max-w-xl mx-auto w-full">
        <Uploader />
      </div>
      <p className="font-light text-gray-600 w-full max-w-lg text-center mt-6">
        <Link
          href="https://vercel.com/blob"
          className="font-medium underline underline-offset-4 hover:text-black transition-colors"
        >
          可自改这是标题
        </Link>{' '}
        Web. Built with{' '}
        <Link
          href="https://nextjs.org/docs"
          className="font-medium underline underline-offset-4 hover:text-black transition-colors"
        >
          Next.js App Router
        </Link>
        .
      </p>
      <div className="sm:absolute sm:bottom-0 w-full px-20 py-10 flex justify-between">
        <Link href="https://vercel.com">
          <Image
            src="/vercel.svg"
            alt="Vercel Logo"
            width={100}
            height={24}
            priority
          />
        </Link>
        <Link
          href="https://github.com/vercel/examples/tree/main/storage/blob-starter"
          className="flex items-center space-x-2"
        >
          <Image
            src="/github.svg"
            alt="GitHub Logo"
            width={24}
            height={24}
            priority
          />
          <p className="font-light">Github</p>
        </Link>
      </div>
    </main>
  )
}
- 保存后,系统会重新部署一次,返回 Settings → Domains,添加你的域名(确保你的域名托管商已添加记录为 A: 76.76.21.98 的记录,添加即可)。
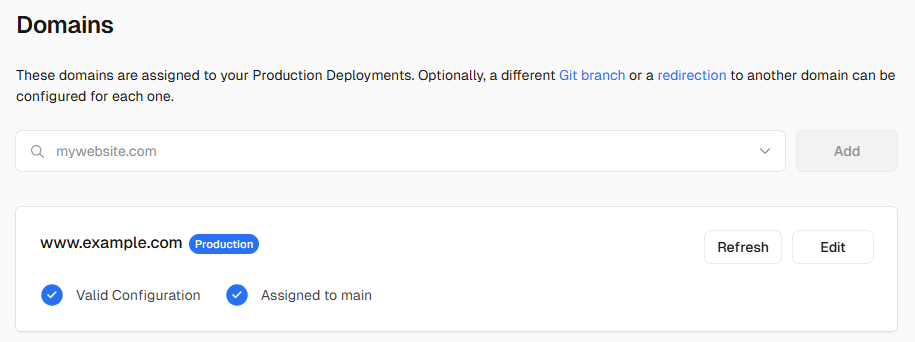
- 完成!
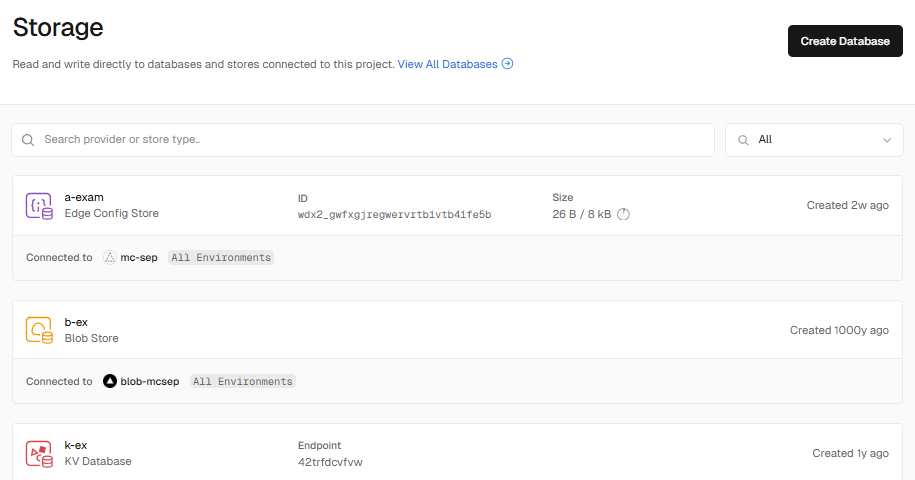
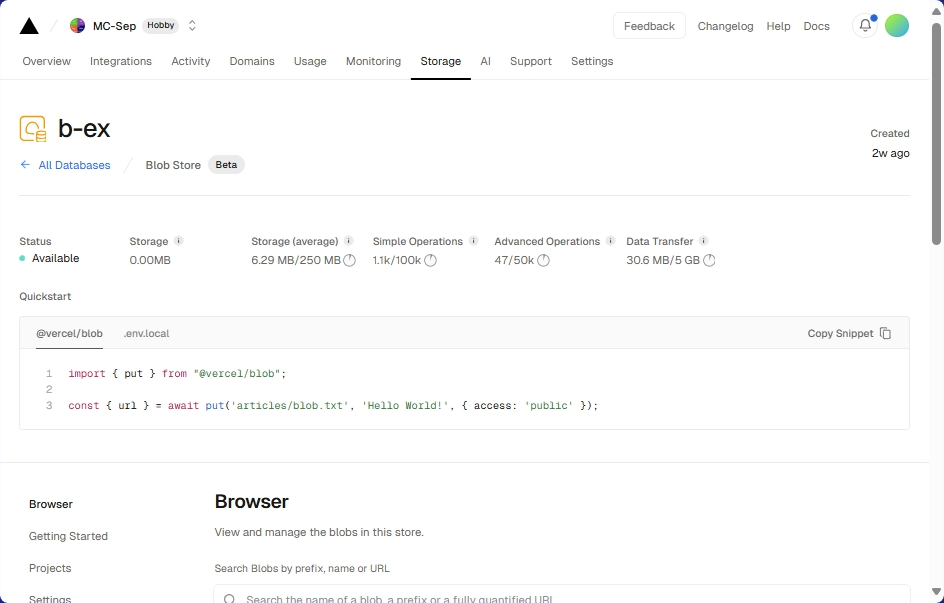
提示:可以在 Storage 页面查看存储库状态,例如大小、读写次数统计等。
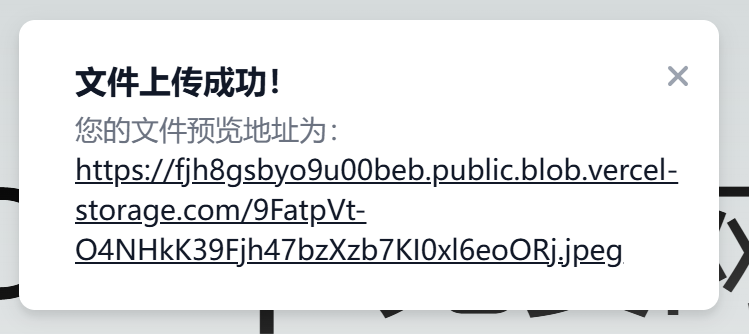
展示



总结
这个页面可能有点丑,有能力可以自己修改!这个方法适用于刚建立博客的博主,但是长期使用可能会比较慢,可以使用 CDN 加速。